

We made these ornament/tags for Crafty Night: November last night.
I LOVE how they turned out. I kept seeing them all over the internet, but mostly made
with porcelein clay, air dry clay, or salt dough. I was like, "Uh, what about plain old polymer clay?"
So I grabbed a big block of Fimo soft. (SUCH an awesome clay compared to my Sculpey III frustration last year!)
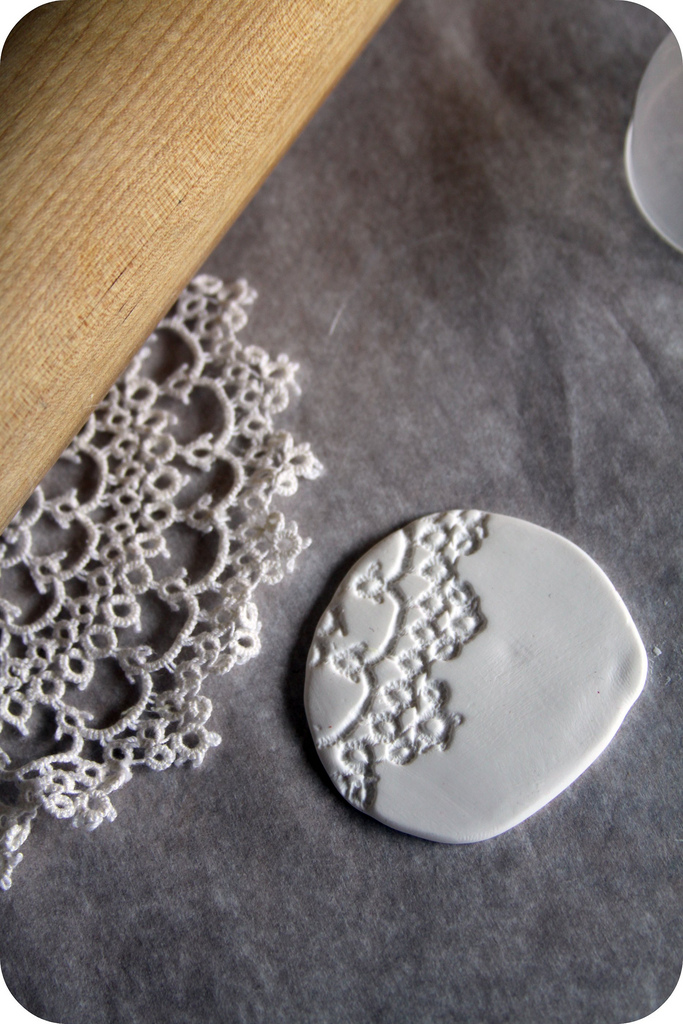
First thing I did was lay a piece of parchment paper onto my table. Wax paper would be fine too. Just so your clay doesn't stick to the table. And after warming a small piece of clay in my hands, I rolled it out with a rolling pin. That plastic orb thing in the picture is actually part of a two-inch plastic capsule from a gumball machine. It will be used later to cut out my shape.

Next, grab a doily & press it into your clay by gently rolling the pin over it.

Remove the doily. The cool thing about clay is that if it doesn't come out the way you like it, you can smash it all up & start over.
(This is BEFORE you bake it of course!)
Use your "cookie cutter" of choice.
You can cut out any shape you'd like.

Use rubber alphabet stamps to personalize your clay piece.
These are perfect for gift tags on prezzies if you embellish with someone's name.
And these go from prezzie-to-tree-ornament in a jiffy!
I'm all about the 2-in-1 gifts!
Use a straw to make a hole in the top.

Bake in your oven according to the directions on your specific clay.
Fimo soft is baked at 230 degrees F, for up to 30 minutes. These ornaments were baked for 25 minutes in my oven.
Loop on some string & you're done!
(From the 12.34 oz brick of Fimo soft, we got about 36-40 of these sized ornaments.)
(From the 12.34 oz brick of Fimo soft, we got about 36-40 of these sized ornaments.)
You can paint or seal these if you want. But it's not necessary.
I am going to try "staining" some so the stamping really pops.

I'm totally diggin' the owlie "dream" ornaments & will have some in the shop later this week!
♥

those are sooo cool! Thanks for the tutorial info!
ReplyDeleteThese are wonderful and such a great tutorial...thanks for taking the time to share.
ReplyDeleteI'm loving the owl dream one too, super cute! I've always liked stamps, but never thought they were worth buying (How often do I have stuff to stamp?) but I could see making a ton of these with different cute stamps! :)
ReplyDeleteWhat a fantastic idea! These are just beautiful! There is just something magical about the power of the doily!
ReplyDeleteWe are having a Home for the Holidays link party on our blog and I know that our readers would go crazy over these ornaments! We would love for you to join us!
http://www.uncommondesignsonline.com/2011/11/home-for-holidays-link-party_08.html
Gorgeous! Love this idea. I think I need to get myself some Polymer clay! Thank you so much for the inspiration on this and all your other little projects and adventures. Sweet!
ReplyDeleteI have some clay sitting in my drawer and wasn't sure what to use it for. Might have to give these a try!
ReplyDeleteThank you for always being so generous and sharing such great tutorials! Your blog is such a happy little corner of the web, I always enjoy my visits :)
ReplyDeletewhat a great (and adorable) idea...I am going to have to try making these! great blog too!!
ReplyDeleteI just made some snowflakes today with "JOY" stamped in them. I brushed some silver from a stamp pad into them, let it dry,and then used some sandpaper (from instructions off another site). But i am not impressed with how it turned out. Im really interested in your technique and seeing them!
ReplyDeleteIs that a paper doily, or cloth? Reason I ask is that I don't own any doilies, but could see buying a package of paper ones for this project. If cloth, does the clay leave any residue on the cloth after imprint?
ReplyDeleteis beautiful
ReplyDeletetinyxoxo.blogsplot.com
Came across you via Pinterest. Thanks so much for the great tutorial!
ReplyDeleteThese are charming! I've clicked the "pin it" button!!
ReplyDeleteThis is amazing! Thanks for sharing. I've decreed that all ornaments this year will be handmade, so it's perfect :)
ReplyDeleteGreat idea. Any thoughts why my white fimo clay turned cleanish after baking? Thanks, Sheila
ReplyDeleteHi Sheila! Are you sure you didn't have a package of clear/translucent clay? I have made that exact mistake before! The package of translucent clay is white in "color" & looks exactly like white in fact. But when it bakes up, it bakes with an opaque-ish effect.
DeleteHow wanderfull!!! i'm your follower now! thank for the tutorial!
ReplyDeleteBeautiful! Where do you get the letter stamps?
ReplyDeleteHi Lindsay! Thanks! I got the letter stamps in the dollar bin at Craft Warehouse YEARS ago. I've also seen them in the past at the Target Dollar Spot. Check Etsy: I just spied a couple alphabet stamp set there when I did a quick google search under "alphabet stamp set dollar"
DeleteOr check Ebay! The brand is "Studio G". There are oodles of stamps in different fonts there. :)
Delete